The Validator is an amazing tool that allows you to recalculate your existing strategies using new history data. Thus, you can very easily test whether they still make profits.
You can evaluate strategies only if they were created with the EA Studio tool.
Basic Workflow
You can import various files to the Validator such as Expert Advisors, Portfolio Experts, and whole Collections.
After that, you can set requirements that your strategies need to keep. In case the backtest provides good results, the strategy goes to the Collection automatically.
It is very possible for the Collection to contain strategies from before. It is better to remove them and not to mix them with the new ones from the Validator.
If your preference is to preserve the old strategies, then first you need to export them and then delete the old strategies.
As time goes by and you keep creating more strategies, it gets hard to recall when you have created or backtested them for the last time. That is why it is very useful to have them in folders.
You can add a descriptive name of the folder and include the currency pair, time frame and the date. For example: ‘Strategies AUDUSD H4 21 June 2019’.
Toolbar

Progress – it gives you information about the percentage of calculated strategies from the ones you have imported.
Calculated – it shows you exactly how many strategies were calculated at the current time.
Ascended – here you can see how many strategies are validated and then added to the Collection page.
You need to know that the Collection does not accept duplicates, but only unique strategies. Therefore, the number of strategies could stay the same.
Import Strategies
As already mentioned, the EA Studio allows you to import files that you have exported from it before. For instance such files are: Expert Advisors, Portfolio Experts, and Collections.
No matter how many strategies you add, even if there are duplicates among them, they all load into the program.
1. Strategies

When you have strategies in the Validator, the EA Studio keeps them there even if you decide to visit other sections in the program. You do not lose them. You can delete them only if you click the “Remove all” button.
2. Historical Data
When you import your strategies to the Validator, it tests them on a specific market and period.
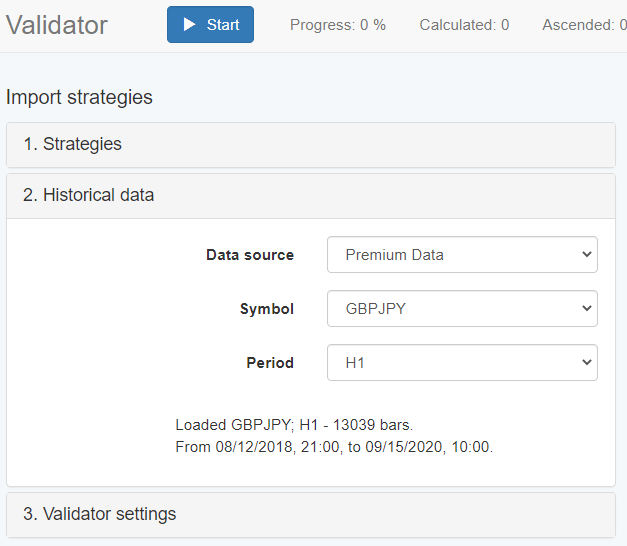
When you look at the bottom of this panel, you can find the time period of the data (From <date> to <date>). If you want to change it, please go to the Data Horizon settings.
3. Validator Settings
The settings of the Validator are not as many as the ones in the Generator since we just validate old strategies.
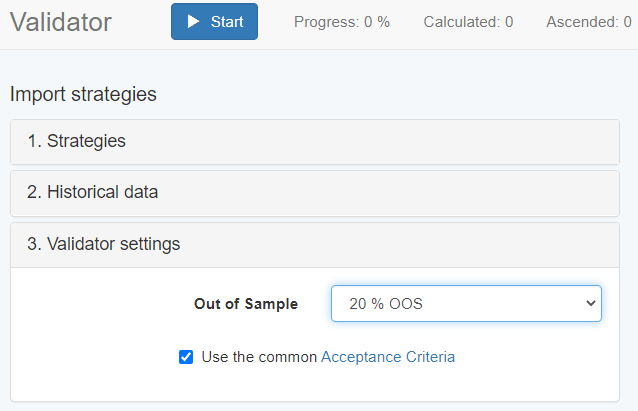
Here you decide whether a strategy has to pass the Acceptance Criteria.
Also, you can choose the percentage of the data that has to go through the Out of Sample testing.
Then, the Validator provides you with some extra tools which test your strategies even further. Simply go ahead and select the ones you want to use.
After you enable certain tools, a panel with statistics appears on the right of the page.
The strategies go to the Collection only if they that pass all of the validation tools defined by you.
Our experience shows that it is beneficial to enable the Acceptance Criteria for your strategies. Thus, you prevent the Validator from losing time with low quality losing strategies.
It is capable of decreasing their losses, but it is pointless to do it. When you activate the Acceptance Criteria option, the strategy has have a minimum of 100 trades. After that it moves onto the next filter.
If your data is insufficient to cover these 100 trades that this filer requires, you can disable it and test the particular market anyway.
Optimize strategies
Full Data optimization
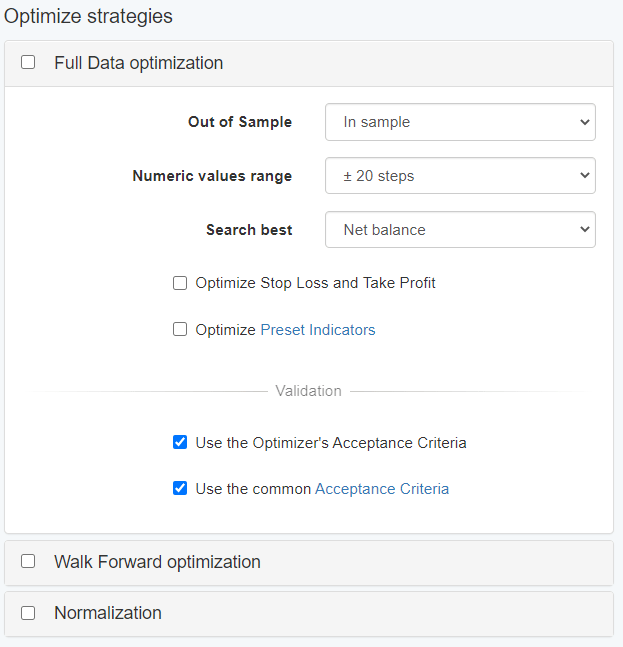
The Optimization tool gives you the main functions of the Optimizer. It optimizes multiple strategies by using various indicators.
Optimize Stop Loss and Take Profit – this option does not apply SL and TP to your strategies, but it optimizes the existing ones.
You should not use it if you want to keep their values as they are.
Numeric Values Range – the Optimizer makes changes to the numeric values of your indicators in order to ensure you get better strategies. In this field, you need to set the range in which the Optimizer can change the parameters.
First, you can choose a small range which normally leads to a faster optimization and small gains. Second, you may use a wider range that results in a better optimization. The downside here is the risk of over-optimization which leads to curve-fitting.
It is not good to count on strategies that can easily fail. The solution is to combine the optimization with another EA Studio tool called Monte Carlo since this can provide robustness to your strategies.
Search Best – whatever parameter you select here (net profit, win/loss ratio, etc.), the Optimizer will do its best to boost its performance.
Out of Sample – here you need to select how much of the data you want to use for In Sample and also for Out of sample analysis.
The strategies fulfill the Acceptance Criteria – the only strategies that pass through are the ones that fulfill the Acceptance Criteria.
Walk Forward optimization
For the next tool, we use two terms: Walk Forward Analysis (WFA) or Walk Forward optimization (WFO). The Walk Forward testing performs a sequential optimization of your strategies.
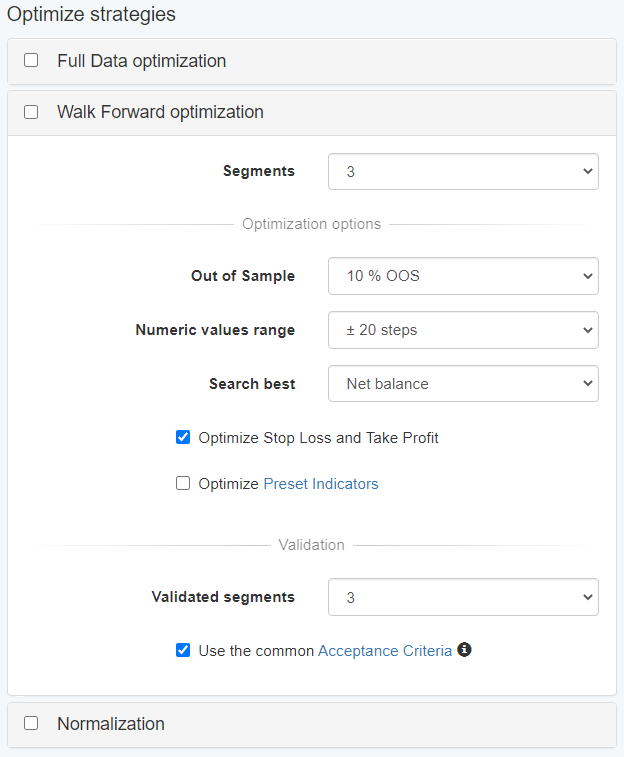
The reason why we named it “walk forward” is that there is a moving window that gradually goes over the entire period of the historical data with a pre-set step.
What the tool aims to achieve is to bring down the over-optimized parameters of the trader’s strategies to a minimum. You might make a strategy look perfect while you backtest it.
However, what really matters is to create reliable trading strategies that perform well when you trade them live.
You can find out more about it in the Walk Forward article.
When you are In the Reactor page of EA Studio, you can run the Walk Forward optimization.
If the end result is that the WFO (Out of Sample) perform much better than the original strategy (full data backtest), then the strategy receives the parameters set during the optimization.
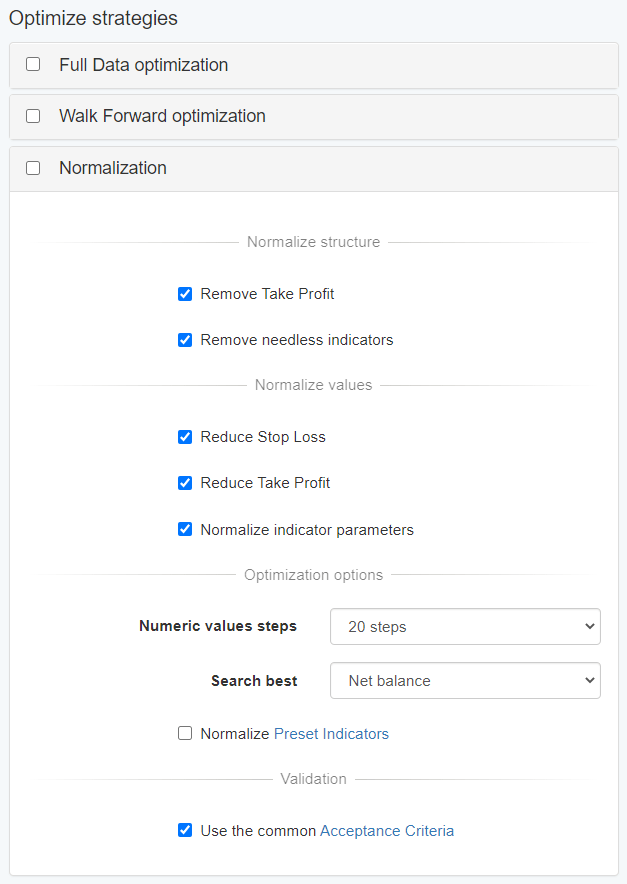
Normalization
In the validator, you have the option to check Normalization. This way the strategies will be “normalized”. The idea of the Normalizer is to simplify the strategies by reducing their Take Profit, Stop loss or remove needless indicators.
Also, it has the option to Normalize indicator parameters. This means that it will try to find better strategies with indicator parameters that are closer to the default values.
Perform robustness testing
The tools that we looked through so far check if a strategy is still profitable and they try to increase its profitability.
However, this tool performs a different kind of testing that is very significant for your strategy. It shows if your strategy is trustworthy, and it does not change the strategies.
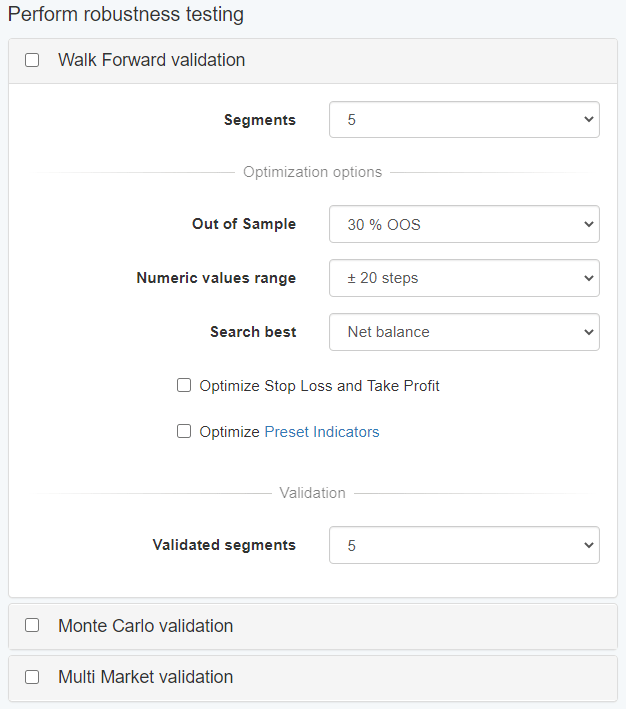
Walk Forward validation
When you run the WFO validation tool, it does not change the values of your strategies, but it filters the strategies. When the validation completes, the results show only the strategies that have passed the validation segments.
Monte Carlo Validation
Monte Carlo is a tool that adds “noise” to the market’s conditions – both in the data and the execution of the trades. In this way, it tests if your strategy performs well when the market behaves differently.
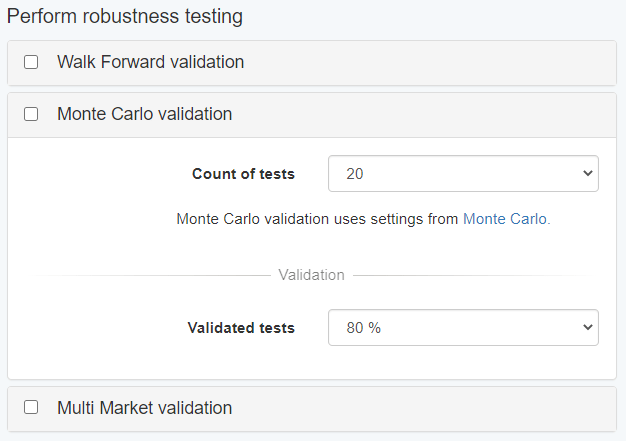
The Validator presents the settings of Monte Carlo in a more simple way to the users. If you want to check their full version, then you need to visit the Monte Carlo page.
Count of tests – the tool adds random noise to the backtest data and the execution of the strategy during a series of tests.
Validated tests – here you specify the percentage of tests that you require to pass the Monte Carlo validation. Let us say that you choose to have 10 Monte Carlo tests and 90% of them to be validated, then 9 of these 10 tests must pass the validation.
Multi Market Validation
When you use this tool you need to pick a few markets on which the validation needs to take place. In general, if your strategies work well on multiple markets, then its parameters are not that curve fitted just for one of them.
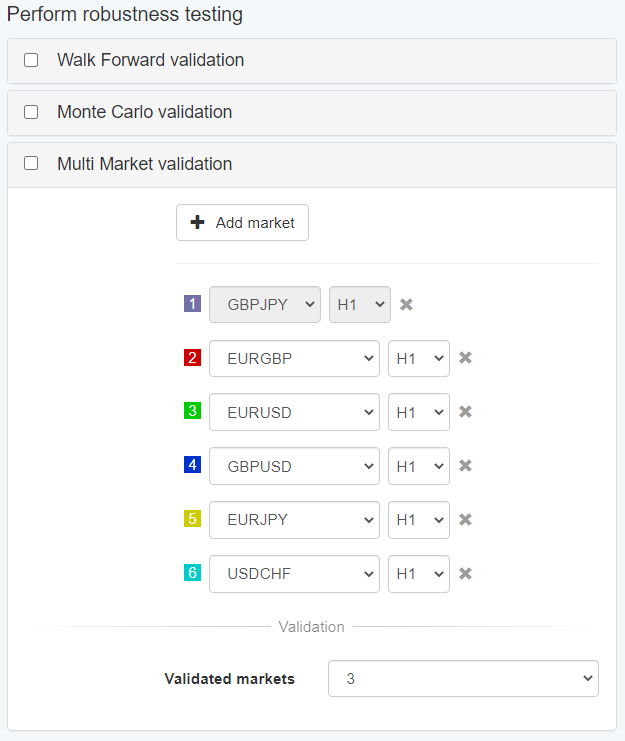
The Multi Market tool uses your broker’s data which you have specified beforehand (please, check 2. Historical Data). You can have a look at the tool’s settings in more details on its section in the Editor.
The tool will use the data from the broker you selected in step 2. Historical Data. Multi Market has also its own settings in the Multi Market section in the Editor.
When you work with this tool, you need to add data for all the symbols you want to test.
Add market – here you have the option to add another market that you want to run a test on.
Validated markets – you need to define the number of markets that has to pass the test since this shows if a strategy meets the Multi Market validation.